To create a new job, go to the “Create Job” section from the dashboard’s left panel.
From the available Job Types, choose “Create PV” Job. Fill in the required details related to the Job Type.
Click “Save” to complete the job process.
While creating a PV Job, select Yes for “Do you want to create a PVB job against this data?” to automatically generate a PVB Job.
The system auto-populates the PVB Job using data from the PV Job.
On clicking Save, the PVB Job opens with all fields auto-filled. Users can modify or add data and click Save to complete PVB Job creation.
2. View Job List
After creating a job, the user will be directed to the Job list, where new job appears at the top of the list. (The job list can also be accessed from the left menu)
In the “Job List Screen” user can search Job by using filters.
Click the “Job No/Ref No” to view Job details.
3. View Job Details
Go to the “Installation Overview” section to view installation details.
Check all the details i.e; Installation Overview, Client Information, Installation Address, System Overview and STC Details.
User can “Edit” information to make changes and “Save“.
4. Installation Team
Go to the “Installation Team” tab.
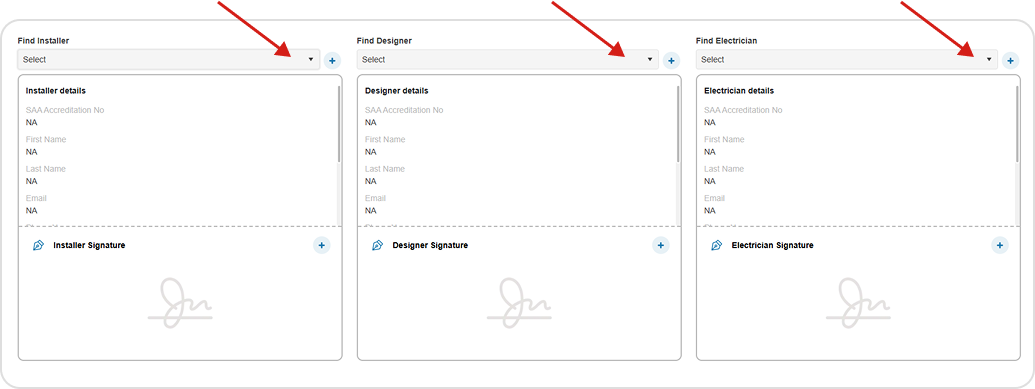
Add “Installer“ and “Designer“ by using their “SAA Accreditation No“.
Add “Electrician” by using it’s “License Number“.
Note
Only electrician can add job using their electrician licence, if licence state matches the job’s state.
An electrician with the account type “PV” can work for all job types, whereas an electrician with the account type “SWH” can only work on “SWH” jobs.
→ Follow these links to see the process of PVB and SWH jobs in more detail.
To Add Installer, user needs to enter his valid “SAA Accreditation Number” and click outside the field.
The system will verifies the SAA Accreditation Number and auto-populate the related details.
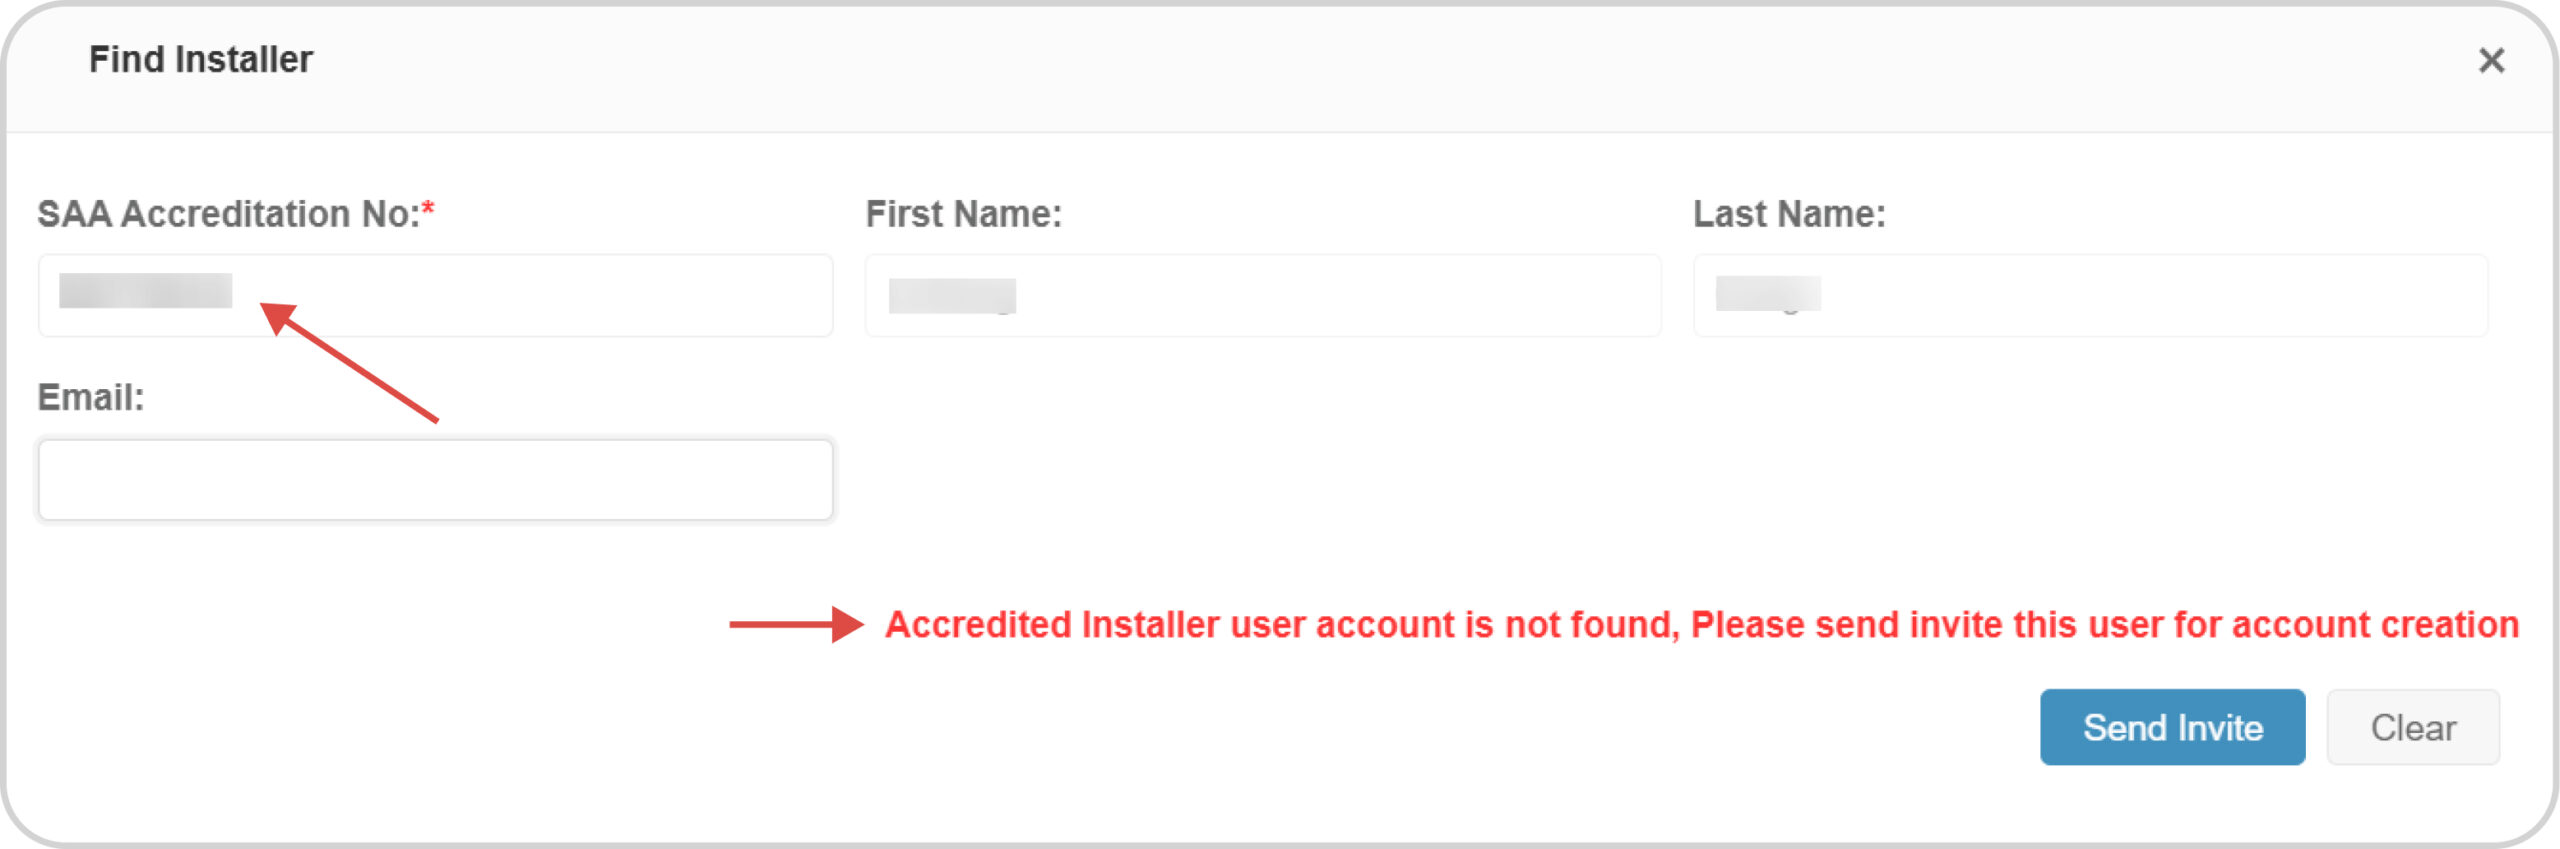
If the system does not verify the SAA Accreditation Number, it means:
This installer is not registered with Form Panda, Click “Send Invite” to invite them to register.
User entered an invalid “SAA Accreditation Number“.
Installer, Designer, and Electrician will be automatically listed in the dropdown after being added, User can add them to the job by selecting from the dropdown list.
Add Signature
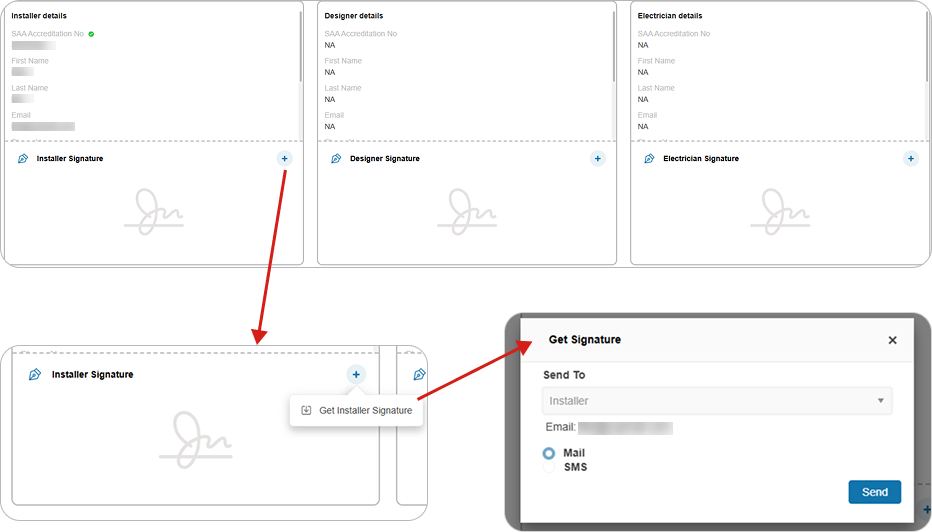
The installation team is expected to sign through mobile app. In case of missing signatures, Solar Retailer can send signature request to their email by following these steps:
Add “Signatures” for “Installer“, “Designer“, and “Electrician” by clicking the “Add” icon.
Solar Retailer will send signature request via email or SMS by clicking the “Send” button.
“Installer“, “Designer“, and “Electrician” can add their signatures by accessing the written statement link sent to their email. Once completed, their signatures will appear in the signature section.
Assigning an installer to a job will automatically schedule a visit, and the auto-generated requirement list for that job will be shown in the “Requirements” tab.
Go to the “Requirements” tab to view the auto-generated requirement list.
The Installation team can add all the required data to the requirement list using mobile app.
After completing requirement list, Installer need to submit the job using mobile app to update status from “New” to “Installation Completed“.
Note
Only an authorized user can verify “Product” and “Installation” for scanned pv serials from CER portal, when the job is in creation pending status.
If the scanned panel serial numbers are not verified from CER portal, both “Product Verified” and “Installation Verified” statuses will appear in red.
5. Documents
The CES document can be uploaded directly.
When images are uploaded under the “Photo of Electrical Safety Certificate” requirement, they will be generated as a document in the CES docs.
6. Trade STC Job
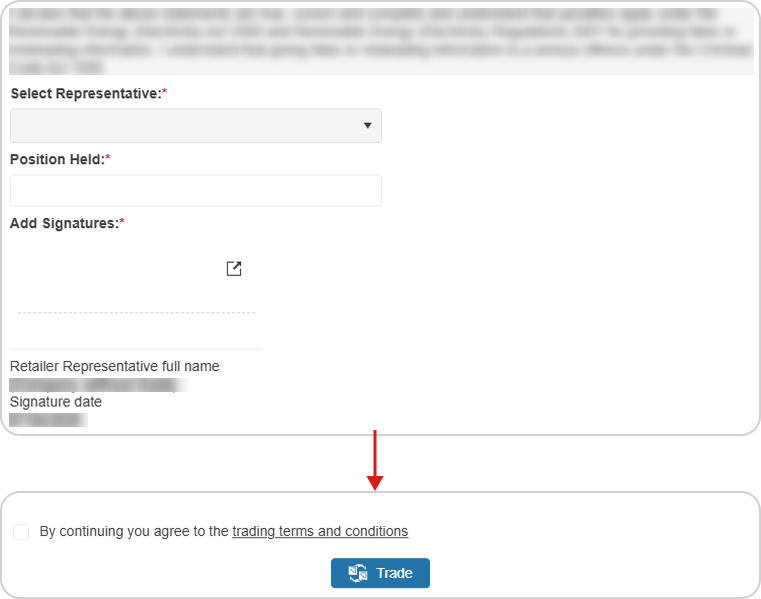
Go to the “Trade STC” tab in the job details, Select the pricing term and click the “Trade STCs” button.
After clicking the “Trade STCs” button, the “Edit Representative Details” popup will appear. Select the representative, fill in the position held, add the signature, agree to the terms and conditions, and click the “Trade” button.
Once trading is initiated, the job moves towards the traded status.